
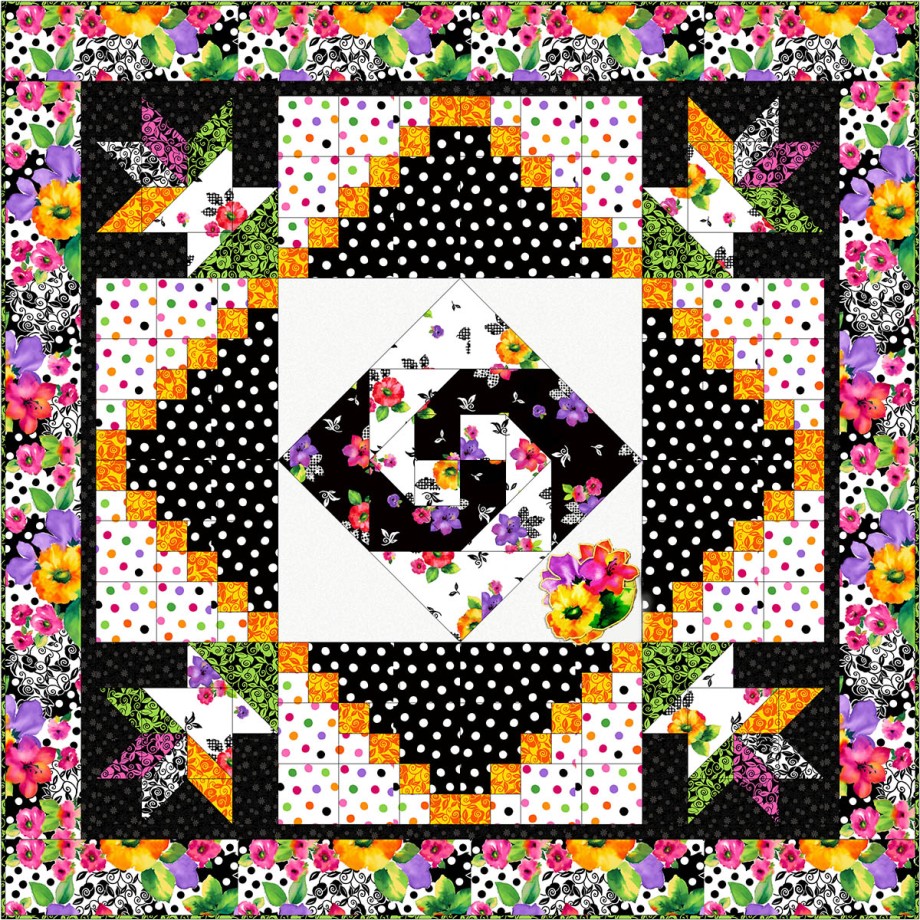
Did you enjoy making your Monkey Wrench Medallion?
If you missed earlier posts, just click over here, gather your supplies, then join in as we make this fun lap quilt together.
Just a reminder of our abbreviations & tips for a successful project:
- WOF – Width of Fabric. This is a cut made Selvage to Selvage.
- LOF – Length of Fabric. This is a cut made parallel/along to the Selvage.
- RST – Right Sides of the fabric Together (facing each other)
- WST – Wrong Sides of the fabric Together
- HST – Half Square Triangle
- Accurate ¼” seam allowances will insure your blocks finish to the correct size.
- Press all fabrics before cutting
This week we are going to cut the borders and add the first step to the 3D applique.

You will need 1/3 yard fusible web. If you are new to this product, here are brand names to ask for at your Local Quilt Shop: I like Heat N Bond Lite™ or Featherlite™, but Wonder-Under™ and Steam-A-Seam™ are other options.
Cutting: Reserve border & binding fabrics for next week- – – – – – – –
Green Floral Scroll, 26320-JH, cut (7) 2.5″ WOF strips for binding
Black Illusions, 21516-J, cut (5) 1.5” WOF strips for inner border
Large Floral, 26317-X
cut (6) 5.5” WOF strips for outer border
From remaining fabric, choose a flower cluster, no more than 10” square. You need two identical flower clusters. Cut out the clusters in a square or rectangle. Mine are about 9” x 7” rectangles.
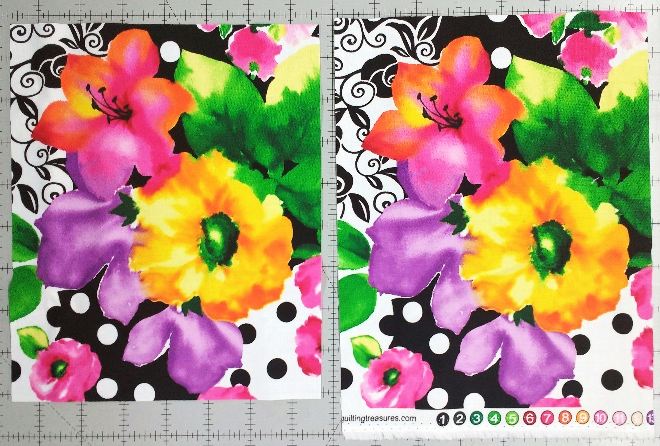
Trim fusible web to the size of your clusters, cutting 2 rectangles/squares the same size.
Following manufacturer instructions, fuse the web to the WRONG SIDE of the flower cluster fabric.
Fussy cut ONLY 1 of the clusters. Reserve the other cluster for later in our project.

Place applique flower – – – – – – – – – – – – – – – – – – – – – – – – – – – – – – –
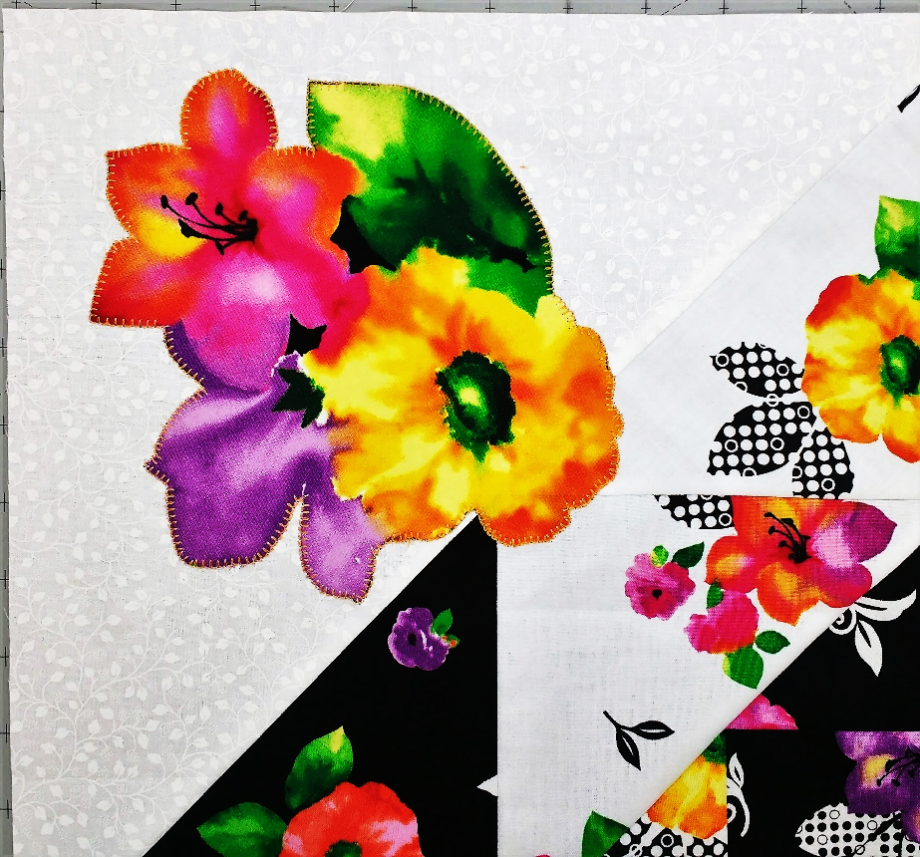
Once the flower is cut out, place it on the Monkey Wrench block where it makes you happy. Be sure to leave at least 1/2” margin to the edge of the block. You don’t want the applique to fall into or right up against the seam allowance. If you want it all in the white, super. If you want it to overlap the patchwork, that’s great too. Once you love it, peel the paper backing and fuse in place, again following manufacturer instructions.
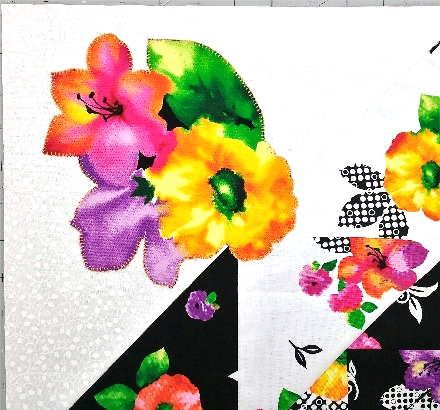
Hand or machine stitch the applique in place by your preferred method. I used a blanket stitch (settings 2.5 length & 2.5 width of stitch) with golden yellow 40 wt. thread.

I am excited to see your progress each week! Be sure to tag any social media posts with #QTBrookeQAL and #QTfabrics so we can see your blocks and share in your stitching fun!
Come back to the QT blog next Wednesday for the next block in our quilt. If you have any questions, just comment or email me directly @ shannon@fabricsnquilts.com.
**Reminder**
We will have a big giveaway the last week of the quilt-along! One lucky winner will receive our entire Harmony collection as fat quarters – that’s 84 fat quarters! WOW!
There are multiple ways to enter the giveaway:
- Upload a photo using the hashtags (#QTBrookeQAL and #QTFabrics) on Instagram
- Comment on this blog
- Comment on the Facebook event with photos!
HAPPY STITCHING – – – – – – – – – – – – – – – – – – – – – – – – – – – –


Sew bright and cheery project! 🙂
LikeLiked by 1 person
Wonderfully bright and happy fabric. Will be a great addition to my Spring décor.
LikeLiked by 1 person
Love this quilt! Love the fabric! I want to make this one!
LikeLiked by 1 person
WOW! Love this fabric! Would love to win!
LikeLiked by 1 person