
Welcome back! We hope you had a wonderful Thanksgiving holiday!
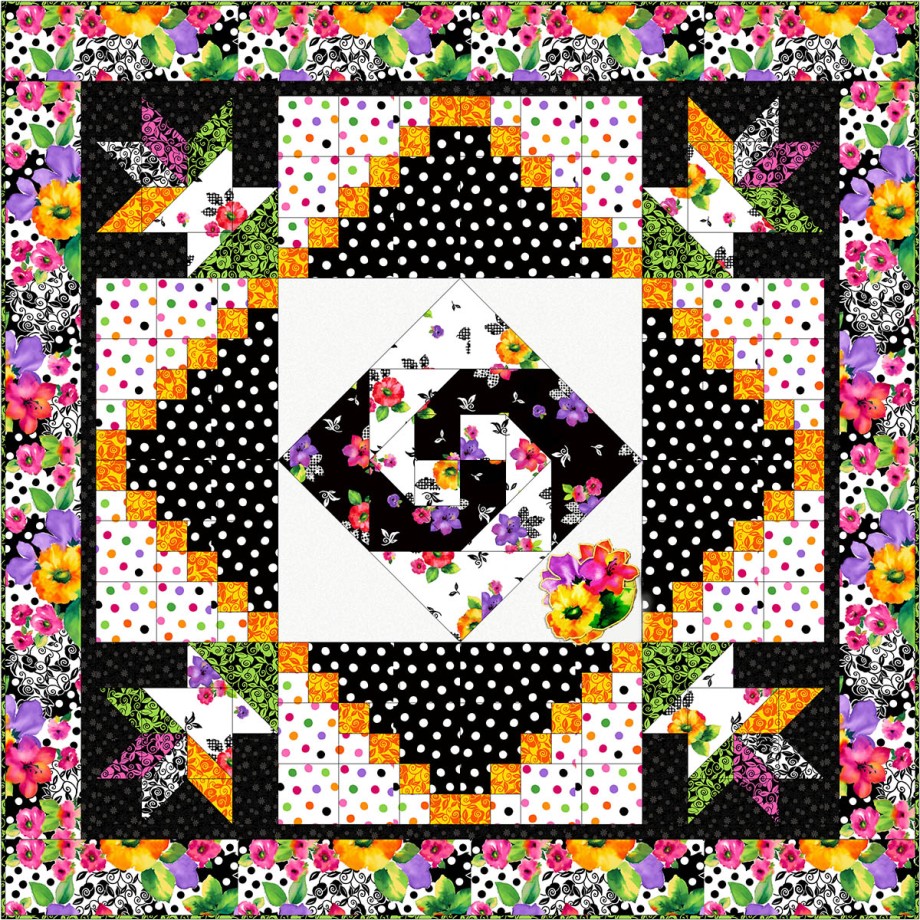
Are your flower basket blocks from last week brightening up your sewing space? It’s time to get one step closer to a finished project & make our center medallion!
If you missed our earlier posts, just click over here, gather your supplies, then join in as we make this fun lap quilt together.
Just a reminder of our abbreviations & tips for a successful project:
- WOF – Width of Fabric. This is a cut made Selvage to Selvage.
- LOF – Length of Fabric. This is a cut made parallel/along to the Selvage.
- RST – Right Sides of the fabric Together (facing each other)
- WST – Wrong Sides of the fabric Together
- HST – Half Square Triangle
- Accurate ¼” seam allowances will insure your blocks finish to the correct size.
- Press all fabrics before cutting
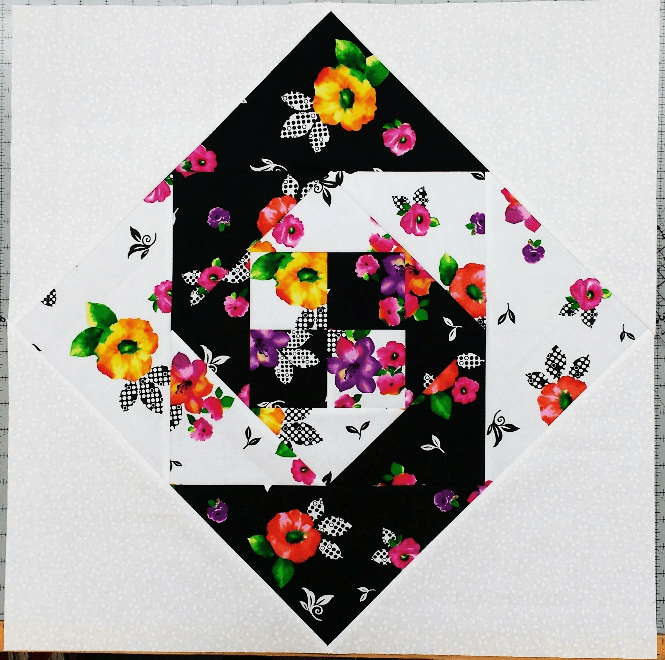
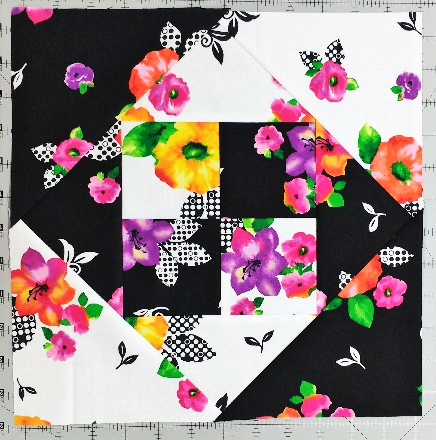
Let’s begin! The center block is a Monkey Wrench block, set on point.
Cutting – – – – – – – – – – – – – – – – – – – – – – – – – – – – – – – – – –
Large Toss Floral Black, 26318-J, cut (1) 9.5” WOF. Subcut:
(1) 9 3/8” square, cut on diagonal ![]()
(1) 5 1/8” square, cut on diagonal
(1) 6 7/8” square, cut on diagonal
(2) 3 1/2” squares (consider fussy cutting these squares to highlight the beauty of the fabric)
Large Toss Floral White, 26318-Z, cut (1) 9.5” WOF. Subcut:
![]() (1) 9 3/8” square, cut on diagonal
(1) 9 3/8” square, cut on diagonal
(1) 5 1/8” square, cut on diagonal
(1) 6 7/8” square, cut on diagonal
(2) 3 1/2” squares (consider fussy cutting these squares to highlight the beauty of the fabric)
White Tonal Illusions, 21517-Z
![]() (2) 12 7/8” squares, cut on diagonal
(2) 12 7/8” squares, cut on diagonal
Let’s start in the middle & work our way out.
Four Patches– – – – – – – – – – – – – – – – – – – – – – – – – – – – –
We made several of these in our chain blocks, but here we just need one.
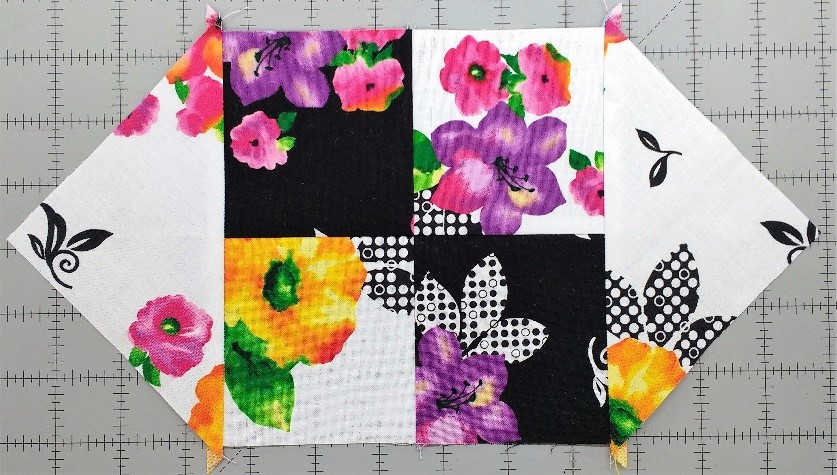
Stitch 2 pairs of black & white squares. Press toward black floral.

Stitch the 2 halves together to finish the block. Unit should measure 6.5”

Stitch the 2 halves together to finish the block. Unit should measure 6.5”
Adding HST Borders – – – – – – – – – – – – – – – – – – – –
Sometimes, when making a new, unfamiliar block, construction makes more sense if you can dissect it and put it in terms of other blocks you already know how to make.
You can think of the Monkey Wrench block as a four patch with lots of HST borders or rounds, kind of like how a log cabin goes around (and around, and….). This is just a center square with triangles instead of rectangles. Or you can think of it like a square in a square (in a square in a square in a square) block.
Looking at the block, we want to make sure we put the white & black triangles on the correct side of the four patch, this way we will get the swirl effect. If it helps, the color you are adding should match the color on the bottom corner of the block that’s made.
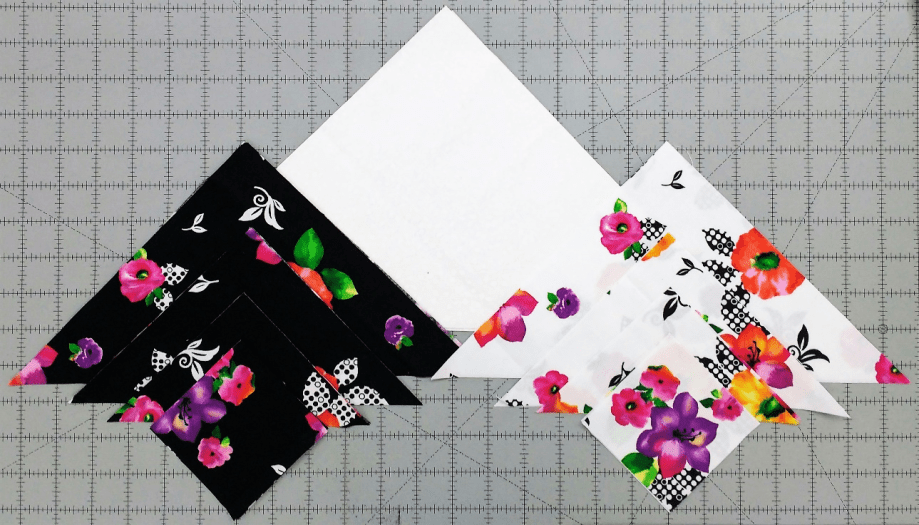
Working from the smallest triangle to the largest, stitch white triangles from the 5 1/8” square to opposite sides of the four patch. Treat your triangles with care; you are stitching the bias-cut edge. Any pulling or tugging will pull your piece out of square.
Press with care toward the triangle.

TIP: You want to line up the triangle exactly, so that the block finishes square.
With WST, finger press the triangles in half along bias cut edge to mark center of block. Align that fold with the center of block.
Double check the placement by lining up the point of the triangle with the seams of the four patch.
On opposite sides of the four patch, add the same size black triangles & press again toward the triangle. Trim triangle “dog ears”

dog ears—————————->
dog ears————————–>
This block should now measure 9”
Add the triangles from the 6 7/8” square in the same order.
When complete, the block should measure 12.5”
Add the last black & white triangles in just the same way as before. When complete, the block should measure 17.5”
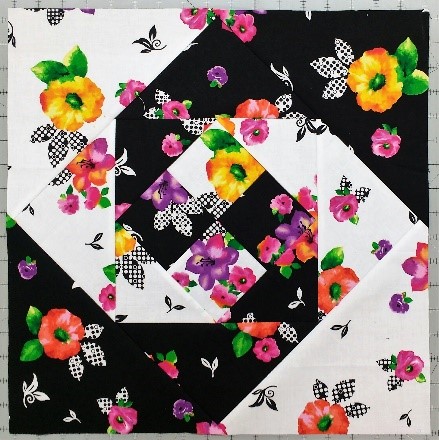
Add the remaining white tonal triangles to all 4 sides, following the same process as before. This will put the block on point & when complete, the block should measure 24.5”

I am excited to see your progress each week! Be sure to tag any social media posts with #QTBrookeQAL and #QTfabrics so we can see your blocks and share in your stitching fun!
Come back to the QT blog next Wednesday for the next block in our quilt. If you have any questions, just comment or email me directly @ shannon@fabricsnquilts.com.
**Reminder**
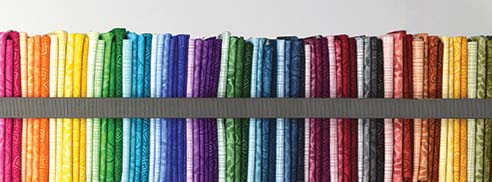
We will have a big giveaway the last week of the quilt-along! One lucky winner will receive our entire Harmony collection as fat quarters – that’s 84 fat quarters! WOW!
There are multiple ways to enter the giveaway:
- Upload a photo using the hashtags (#QTBrookeQAL and #QTFabrics) on Instagram
- Comment on this blog
- Comment on the Facebook event with photos!
HAPPY STITCHING – – – – – – – – – – – – – – – – – – – – – – – – – – – –


Great instructions. Made this block so easy.
LikeLike
I can’t believe it’s the 4th week already! This is looking so pretty.
LikeLike