
If you missed our earlier posts, just click over here, gather your supplies, then join in as we make this fun lap quilt together.

Just a reminder of our abbreviations & tips for a successful project:
- WOF – Width of Fabric. This is a cut made Selvage to Selvage.
- LOF – Length of Fabric. This is a cut made parallel/along to the Selvage.
- RST – Right Sides of the fabric Together (facing each other)
- WST – Wrong Sides of the fabric Together
- HST – Half Square Triangle
- Accurate ¼” seam allowances will insure your blocks finish to the correct size.
- Press all fabrics before cutting
Cutting: – – – – – – – – – – – – – – – – – – –
No cutting this week! Just grab all the border strips you cut last week and all your blocks!
Assemble your top center: – – – – – – – – – – – – – – – – – – – – – – – – – – – – – –
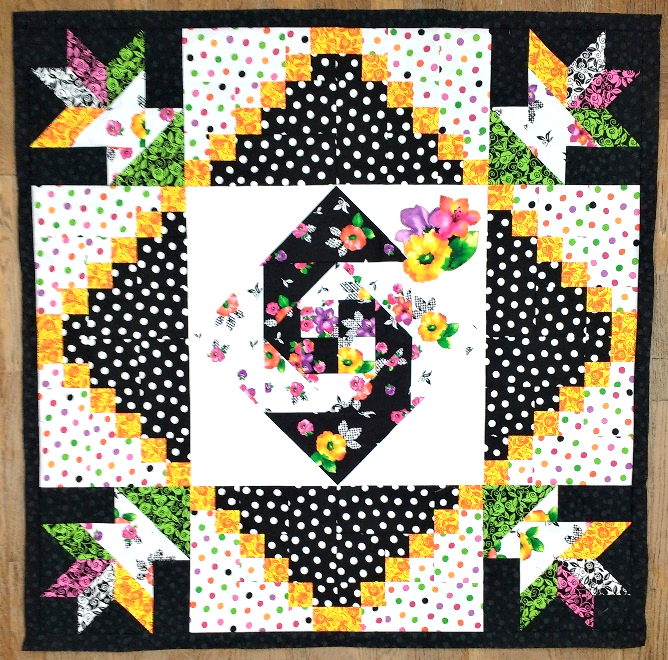
You’ve probably gathered by now that I like to visually see the layout before I sew. SO, layout your blocks in advance of stitching your rows.

Press in the direction of the arrows above. Stitch each row, then attach the 3 rows together. Press last seams toward outer row or open, as you prefer.
Finished quilt center should measure 48.5” square
First Border: – – – – – – – – – – – – – – – – – – – – – – – – – – – – – –

Stitch the 1.5” black Illusion strips into one long length.
Cut border pieces (2) 1.5” x 48.5” and (2) 1.5” x 50.5”
Stitch smaller lengths to opposite sides of the top. Press toward border
Stitch remaining border pieces and press toward border.
Last Border: – – – – – – – – – – – – – – – – – – – – – – – – – – – – – –
Stitch the 5.5” Large Floral strips into one long length. Cut border pieces (2) 5.5” x 50.5” and (2) 5.5” x 60.5”
In the same order that you added the inner border, stitch smaller lengths to opposite sides of the top. Press toward border.

Stitch remaining border pieces and press toward border.

Prepare Backing: – – – – – – – – – – – – – – – – – – – – – – – – – – – – – –
Remove Selvage edges.
Stitch together (2) 1 7/8 yard cuts of fabric along length of fabric (stitches will be on the edge where selvage was removed.

Prepare Binding: – – – – – – – – – – – – – – – – – – – – – – – – – – – – – –
Stitch together all Green Scroll Floral binding strips into one long strip using mitered seams. Press in half lengthwise.

Quilt & Bind your quilt in your preferred method….but that’s not the end of this project!
I am excited to see your progress each week! Be sure to tag any social media posts with #QTBrookeQAL #QTfabrics so we can see your blocks and share in your stitching fun!
Come back to the QT blog next Wednesday for the last step in our quilt. Next week we will show you how to make your applique jump up off your quilt for a fun 3-D applique technique.
If you have any questions, just comment or email me directly @ shannon@fabricsnquilts.com.
**Reminder**
We will have a big giveaway the last week of the quilt-along! One lucky winner will receive our entire Harmony collection as fat quarters – that’s 84 fat quarters! WOW!

There are multiple ways to enter the giveaway:
- Upload a photo using the hashtags (#QTBrookeQAL and #QTFabrics) on Instagram
- Comment on this blog
- Comment on the Facebook event with photos!
HAPPY STITCHING – – – – – – – – – – – – – – – – – – – – – – – – – – – –


What a wonderful QAL. Love the colors on your quilt. martisovitsd(at)central(dot)edu
LikeLiked by 1 person
This looks so pretty. I can’t wait for the applique part. Shannon’s directions are great, too! Thanks.
LikeLiked by 1 person